GeForce Experience is an application from NVIDIA which goes together with GTX graphics cards. This application lets the users update their graphics card drivers easily, optimize their game settings and do a lot more.
Although you can use your computer without GeForce Experience, using the application will give you more benefits than disadvantages. Some users use the application to record their gameplays or stream. That is why getting an error when trying to use it may cause a lot of inconveniences.
[Solved] NVIDIA GeForce Error Code 0x0001
Automatically Repair Nvidia Geforce Errors 0x0001
System Information
- Your machine is currently running Windows 10
- That Repair Utility is compatible with your operating system.
Recommended: To repair Nvidia Geforce Errors, use this software package; Restoro System Repair. This repair tool has been proven to identify and fix these errors and other Windows issues with very high efficiency.
- 100% safe, as confirmed by Norton.
- Only your system and hardware are evaluated.
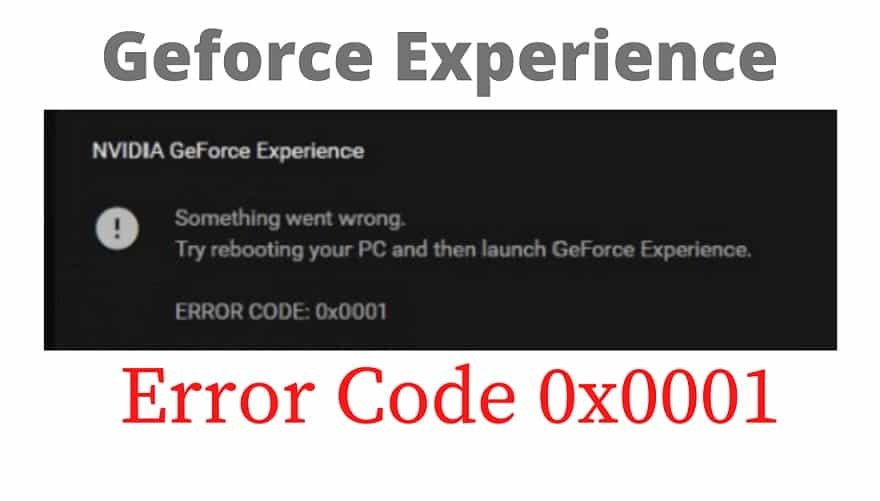
One of the common issues some users may experience when opening up the NVIDIA GeForce Error Code 0x0001. This error prevents users from launching GeForce Experience no matter how much they try to relaunch the program. Here’s a screenshot of that error code :
Getting this error message may not be an excellent experience as you will not experience all the features that come with your graphics card. But, just like any other problem, fixing this error is possible and simple.
Here are 5 methods that you can follow to fix the NVIDIA GeForce Error Code 0x0001:
1 Method – Make Sure the NVIDIA Display Driver Services are Working
- Startup the Services window by pressing the “Windows” key and “R” and type in “services.msc” in the run line command, and press enter.
- In the Services window, look for the following services and make sure they have the same settings as listed:
- NVIDIA Display Container LS – Automatic
- NVIDIA NetworkService Container – Manual
- NVIDIA LocalSystem Container – Automatic
- NVIDIA LocalSystem Container – Automatic
- NVIDIA GeForce Experience Service – Automatic (Delayed Start)
- NVIDIA Geforce Experience Backend Service – Automatic (Delayed Start)
- NVIDIA Telemetry Container service – Automatic
In our sample screenshot, we have selected NVIDIA Display Container LS. Good press on the service and select properties. In the Startup Type, make sure you have set it to “Automatic” and then press “OK.”
Perform the same steps for the rest of the services.
Note: Make sure all services are running. Press on “Start” the services on the upper left corner of the window if the service is stopped.
- Once you have made sure all the services have been properly configured, restart your computer and check if the NVIDIA GeForce Experience is already working correctly.
2 Method – Update the NVIDIA Display Drivers
To get the new features and bug fixes, you have to make sure that your display drivers are updated. Most times, you can download the latest updates through NVIDIA GeForce Experience. But, if you are getting the error code 0x0001 then you won’t be able to update the display drivers through the GeForce Experience.
To manually update your display drivers, follow these steps:
- Press the “Windows” and “R” keys to bring up the run line command. Type in “devmgmt.msc” and press “open” to bring up the Device Manager.
- In the Device Manager, press on “Display Adapters” and right-press on your graphics card. Choose “Update Driver”, press “Search Automatically for Drivers”, and wait for the download to finish and run the installation.
- Once the driver has been installed successfully, restart your computer and check if NVIDIA GeForce Experience is already working properly.
3 Method – Reinstall a Fresh Copy of GeForce Experience
To reinstall a new copy of GeForce Experience, you will have to remove the current copy on your computer. By performing these steps, you remove the potentially corrupted files from your pc and install the latest ones.
- Press down the “Windows” and “R” keys and type “appwiz.cpl” in the run command line and click “enter” to open the Programs and Features window.
- In the list of installed programs, press on the “NVIDIA GeForce Experience” and press “Uninstall/Change”, and follow the prompts to delete the program fully.
- After successfully removing NVIDIA GeForce Experience from your PC, download a new copy of the program by going to their official website.
- After downloading a new copy of GeForce Experience, double press the executable file to launch the installation, follow the installation wizard as usual, and confirm if the issue has been fixed.
4 Method – Run the Windows Update Tool and Download Optional Updates
There are cases when the latest Windows Updates can cause problems with third-party programs. This includes a conflict with the NVIDIA GeForce Experience. In this case, you may look at the optional updates from Windows 10 and check if there are bug fixes for device drivers such as your graphics card.
- Press the “Windows” key on your keyboard and press “R” to bring up the run line command and type in “control update”, and press enter.
- Press on “Check for Updates” in the Windows Update window. If there are no updates available, you should get a message saying “You’re Up to Date.”
- But, if there are optional updates available you will get a notification just like on the below screenshot:
- Press on the “View optional updates” and you will then see a list of optional updates that you can install. If you see one with something to do with your display drivers, you should let the Windows Update tool install it.
Final Words
Performing any of the ways we have provided might be intimidating, especially for those not technically inclined. That is why we have provided detailed step-by-step instructions with photos to make it more comfortable for you to follow.